
As this blog has stated many times, insulation is the low hanging fruit of saving money and protecting the climate. You save money when you are not wasting it by having cooled or heated air leak out of your house.
You protect the climate because energy saved results in less energy used, and thus less climate warming CO2 emissions (less greenhouse gas) emitted. Insulation is a win-win, but unfortunately it’s not very sexy… to most people.
I think insulation is super sexy! Rrrrow, baby! 😻
So check out this relatively easy project that can make your house a little less leaky to the elements, and hopefully save you some bucks in the long run. Even if it takes a while to break even, it will still make the air in your house more comfortable, and also help keep bugs outside where they belong.
What is this amazing insulation project that anyone can do?
It’s simply sealing up all the penetrations through your ceilings and walls to keep outside air from seeping into your living space. All you need are some pretty basic tools, including some spray foam, caulk and a caulk gun, a screwdriver, and a short ladder. Of course, there are some other bits of equipment that will make things go easier.
“Penetrations” can be anything that breaks the surface of the wall or ceiling, including air vents, air returns, light fixtures, electrical outlets, and so on. Any wall that is exposed to the outside on the other side, or the ceiling where the attic is on the other side, is fair game.
If you are not comfortable messing with light fixtures and electric sockets, just sealing around all the vents in your house or apartment if you have central air conditioning or heating will have a big impact.
(Skip the background info and go right to the project)
How much air is leaking out?
Here’s a rough calculation I did to determine how big a “hole” I was plugging up in my house, just for the vents and not counting the many light fixtures I also worked on…
- 17 A/C vents and 5 exhaust fans, for a total of 22 ceiling penetrations
- with average dimensions of 5 by 8 inches each (some are smaller and some are bigger)
- let’s say the gap was a ¼ inch all around (some gaps were negligible and some were huge!)
- 22 x (2 x (5 + 8)) = 572 linear inches
- 572 x ¼ inch gap = 143 square inches
- which is equivalent to a square hole in the wall to the outside of about 12 inches on a side!
This hole is open to the extremely hot or extremely cold attic or outside air, 24 hours per day, 7 days per week, and 365 days per year! Come rain or shine. Wow.
What is a building’s “envelope”?
There is an important concept in construction known as a “building envelope“. Very simply put, this is the envelope that seals your house from the outside elements, and keeps things comfortable inside.
In older homes and buildings this envelope is super leaky and heating and cooling is inefficient and expensive. In newer homes built to current standards, this envelope is a lot tighter, which leads to lower heating and cooling costs, and less energy spent to maintain a desirable climate inside.

A site with lots of details and DIY projects, check it out.
Some building envelopes are so tight, that the house is super efficient and requires very little energy to heat or cool. When an envelope is that tight, you need to have equipment to mix in fresh air from outside. If your house wasn’t built in the past couple of years, then you probably have a more leaky envelope. And even if it was recently built, you may still have plenty of leaks, depending on local building codes and the quality of the builder.

One way to test the tightness of your building envelope is to do a blower door test, which is part of an energy efficiency audit that homeowner’s can have done. I WISH I had done that, because it would give me some hard evidence for myself and to show you. However, closing up a 12 x 12 inch hole will obviously be helpful, and I do have some thermal imaging that may help make the case.
R value, insulation and air flow
“R value” is the value of the resistance of heat flow through insulation, and the higher the number, the better the insulation. Different climates require a certain R number to protect the inside of the house from temperature extremes. More info here… Recommended Home Insulation R-values (also from the Energy Star Seal and Insulate website)
Something that is not often talked about when discussing insulation is airflow through gaps. A well insulated attic with an “R value” of 30 for example, will have it’s R value cut in half or lower if it has tiny drafts blowing through the walls, and through the insulation — resulting in transferring heating or cooling energy from inside your house to the outside. Think of it as dollar bills $$$ slowly leaking out of your house, all day and all night, all year long.
You could potentially get away with less insulation if you have a tight envelope and very few leaky gaps. And obviously, the very best combo is very little air leakage and a lot of insulation. That’s what I am striving for in my house in this super hot climate here in Houston.
My house was built in the 1980s. Back then energy was less expensive, climate change was not on people’s minds, and builders did not concern themselves much with building a tight envelope to a house. So my work is cut out for me.
How to seal the gaps in your living space to tighten up the envelope
Let’s get into the “how to” part of this post, and look at some examples of gap sealing I performed on my house.
Light Fixtures

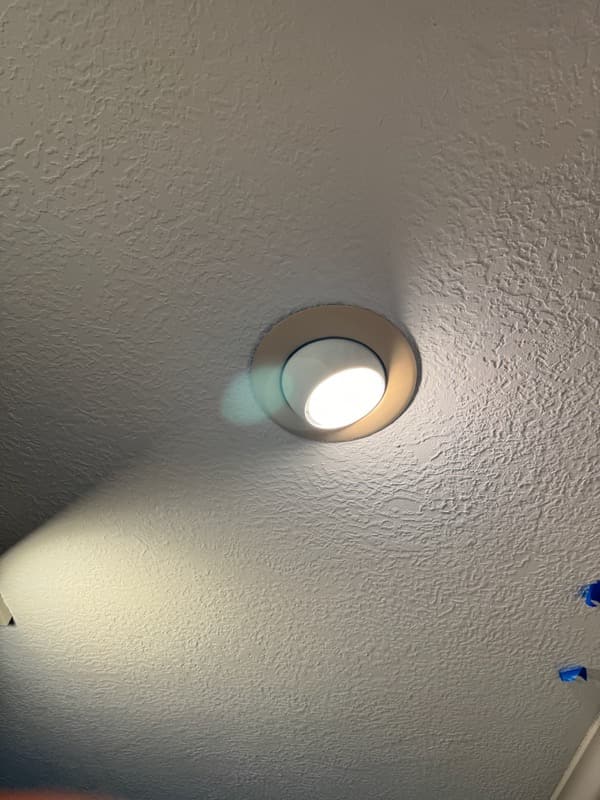

Left, Infrared image of can lights BEFORE insulation and gap sealing; middle, the can light has an LED spotlight in it, so the bulb itself doesn’t get very hot; and right infrared image of can lights AFTER sealing. The thing to note is the reduced orange flare on the lights, which represents heat escaping from the lights. Also, the after pic on the right was done later in the afternoon so the attic was even hotter then.
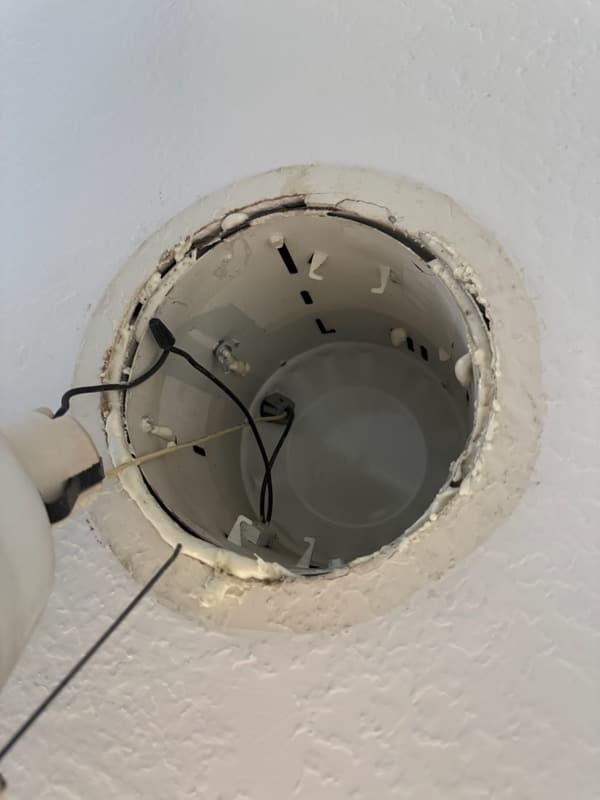


Left pic, Light fixture showing gap into hot attic, with some caulk applied already at the lower border; middle, some loose fiberglass I stuffed inside the can light (don’t do that with an old incandescent bulb! It would get too hot); right shows the final product, caulk around border with fiberglass inside.
Vents and Fans
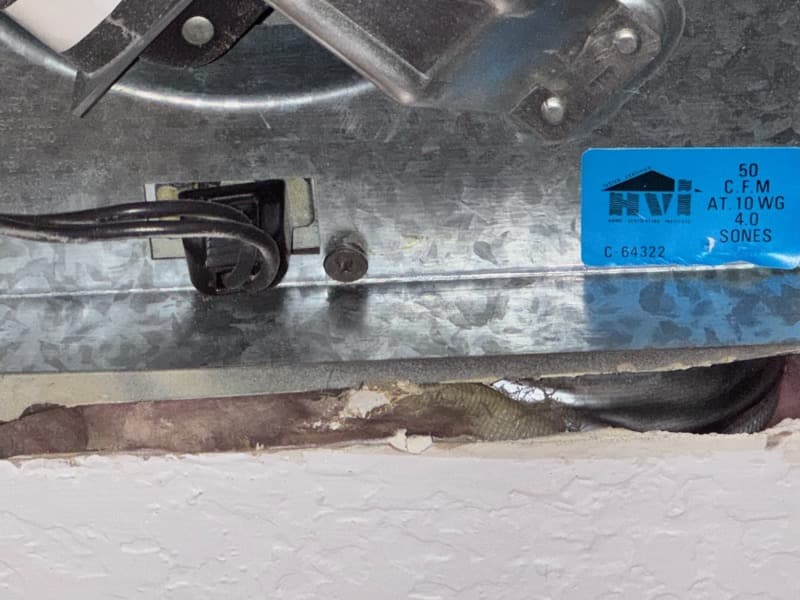

Left side, laundry room fan with big gaps into the attic subfloor. I could see insulation, wires, ducts and all sorts of stuff up there. The insulation was dirty, which is a telltale sign of airflow moving through the insulation. On the right, the final sealed vent, caulk on the left, foam on the right.
Wait until the foam dries before trimming it, though if there are big globs hanging down, you can use a paper towel to gently remove them. You can use your finger to smooth the caulk into the gaps. Def do not touch foam until it dries or you will literally have a sticky, toxic mess on your hands. Gloves are helpful.
Odds and Ends
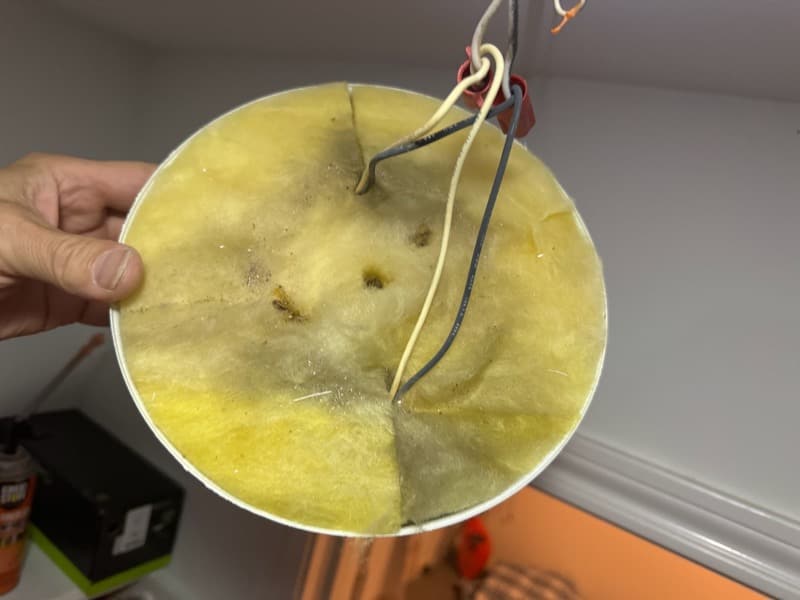


The picture on the left is from a light fixture, after I vacuumed it. It was full of dead bugs and debris that had fallen down from the attic because there was a huge gap. The dark staining results from the dirty air flowing from the attic, flowing through the fixture and out into the room – a telltale sign of an air leak. When you are in the attic, you can also see gray-looking insulation where there is high airflow (bad).
The middle picture is a dirty broken vent, which I replaced. Another tip learned the hard way, when replacing vents, they are sold according to the inside measurement of the vent part, not the outside measurement of the entire vent.
Right picture, attempting to seal an electrical outlet on an outside wall that had a huge gap. Another tip… don’t use spray foam on wall penetrations unless you want to get stray bits of foam (red circle) on your walls and floors. Just use lots of caulking.
If the gap is huge, you could probably stuff a bit of fiberglass into it first. Another tip… if foam lands on carpet, just let it dry for a few hours and then pick it off in one piece. If you try to wipe it up it will make a permanent mess.

Watch out for sharp metal edges that will easily cut you, like the broken off tab in the middle of this picture. Most vent boxes are made out of sheet metal. I covered some of them with metal duct tape to make them safe for the next person (who might be me), but also to smooth out the air flow in some cases, or tack down something that was sticking up into the airflow, like stray insulation.
Side note: Air flow, like water, is laminar (in layers) or turbulent (all mixed up). Laminar flow is more efficient, so strive for laminar flow whenever possible and easy to do. This means smoothing over things that stick into the airflow (like loose insulation or metal edges) with metal tape, straightening out vent louvers, etc. Again, this step is optional if you don’t want to risk getting cut by sharp metal bits. If you are going to do this, your tetanus shot should probably be up to date.
Tools Used

Here’s most of the tools I used (mostly affiliate links), from the shop vac at the top and spiraling counterclockwise… step ladder, big ladder, paper towels, spray foam, brush, Big Stretch caulk, cordless screwdriver, latex gloves and eye protection, pliers, razor knife, flashlight.
A high stretch caulk is easier to apply, and doesn’t break with repeated expansion (heating) and contraction (cooling). I bought the Big Stretch caulk on Amazon at first, then saw it at the local Lowes. A single tube will do about 3 or 4 vents, as long as you don’t get too sloppy (the first couple of tries probably will be).
The step ladder is important to be able to get to the vents in the ceiling obviously. I also used a big ladder because I have some high ceilings. As usual, be careful using a ladder, and it may be good to have someone hold the ladder or at least be nearby in case there’s trouble!
The gloves and eye protection are a must when dealing with spray foam. That stuff is pretty nasty until it hardens. Also the eye protection is helpful when opening vents for the first time, and when trimming the drywall, too keep the bits of drywall out of your eyes. The pliers are handy if you need to bend some metal a little bit. The razor knife is to clean up the edges of the drywall where the vent sticks out.
Some things not shown that I also used were thick gloves if I had a sheetmetal issue (these are probably better), metal snips for trimming sheetmetal, metal duct tape for covering sharp edges and smoothing out airflow, a hacksaw blade to cut excess, dried foam, and a tarp and old towels to help catch the mess. Dealing with the sheetmetal is totally optional. I’m a bit of a perfectionist, so I HAD to do it. 😀
More info…
I am by no means an expert on this, though I am well versed in the basic science of heat/energy flow, and I also read extensively and watch many a YouTube video on this topic. YouTube is an amazing resource these days where you can find actual, top notch experts in any field, giving you the best and latest information on any topic for FREE(!) — insulation is no exception.
Check out these YouTube channels for more info…
- How to re-insulate your attic – Insulation 2.0 – excellent info about re-insulating an older house!
- The Build Show – best practices for energy efficient construction. Great info!
- Attic Insulation Done Wrong… and How to Do It Right! – an older, but excellent video from “Dr Energy Saver”
- Spray Jones – spray foam, mostly for new construction, though depends on your climate and build.
Besides sealing gaps from underneath the attic in the living space, I recently had the insulation in my attic replaced. In a future post we’ll learn how that went; from choosing a contractor, to the install, and what it did for my house.
Please stay tuned for more. And feel free to add your insulation tips and tricks, or questions below. Thank you.
For anyone interested, here is an old research paper about energy loss in structures…
https://web.archive.org/web/20131102121251/http://web.ornl.gov/sci/buildings/2012/1985%20B3%20papers/055.pdf